
LinkedIn Automation Workflow: Design, Implement & Optimize Your Sequences

Ever wonder why some LinkedIn outreach campaigns feel like a genuine conversation, while others scream "bad robot"? The secret isn't just a clever script—it's the engine running underneath. Well-designed LinkedIn automation workflows are reported to convert up to 3x better than manual, ad-hoc outreach. Think about that for a second. 🤔
If you're still sending random connection requests or one-off messages, you're leaving a massive amount of opportunity on the table. Random automation simply doesn't work anymore. To stand out and generate high-intent leads, you need a strategically designed LinkedIn automation workflow.
This guide is your complete blueprint. We're moving past basic "sequences" and into a structured framework for designing, implementing, and optimizing intelligent workflows. You'll learn:
- -The 5 core types of workflows every sales team needs.
- -An 8-step framework to design your own from scratch.
- -Proven templates with real-world conversion metrics.
- -How to choose the right tools and optimize for peak performance.
Let's build something that actually works. Ready?
What is a LinkedIn Automation Workflow?
So, what exactly is a LinkedIn automation workflow?
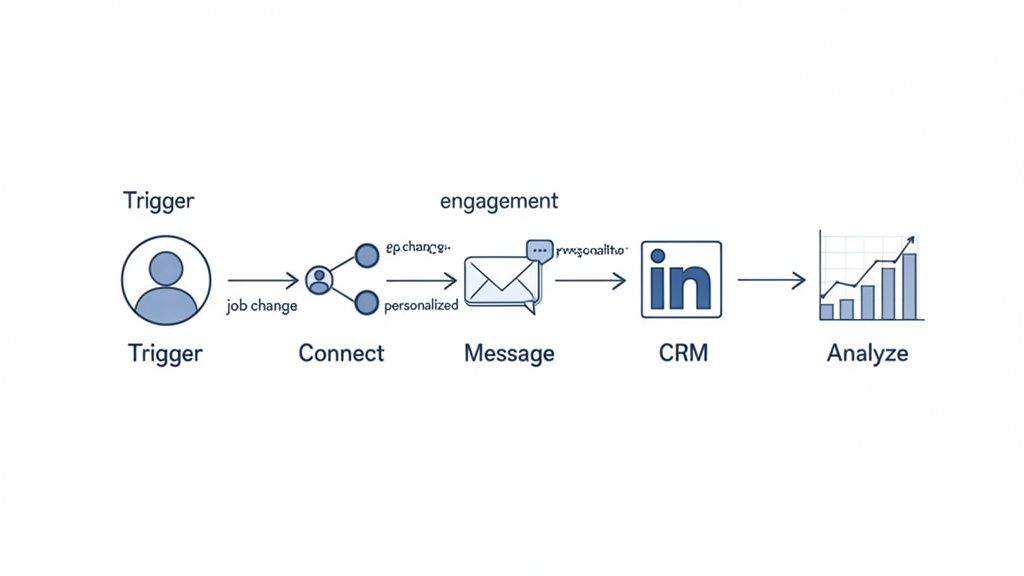
Think of it as your strategic playbook for outreach. It's a pre-defined series of automated steps that guides a prospect from an initial touchpoint to a desired outcome (like booking a meeting). It's not just a list of messages; it's an intelligent system built on triggers, actions, and conditions.
Here are the core components:
- -Triggers: The specific event that kicks off the workflow. This could be a prospect accepting your connection request, engaging with your content, or you adding them to a list.
- -Actions: The tasks the workflow executes. This includes sending a message, viewing a profile, liking a post, or even updating data in your CRM.
- -Conditions: The "if/then" logic that makes the workflow smart. For example, IF a prospect replies, THEN pause the automation and notify a sales rep.
Workflow vs. Campaign vs. Sequence
These terms are often used interchangeably, but they mean different things.
- -A sequence is a simple, linear series of messages.
- -A campaign is a broader initiative with a specific goal and timeline, which might contain one or more sequences.
- -A workflow is the underlying system of logic—the triggers, actions, and conditions—that powers your campaigns and sequences. A workflow is the strategic blueprint; the campaign is the execution.
The biggest benefit? A structured workflow turns unpredictable outreach into a reliable, measurable, and scalable system for generating leads.
Types of LinkedIn Automation Workflows
Not all outreach is the same. Your workflow needs to match your specific goal. Let's break down the five most common and effective types of LinkedIn automation workflows that sales and marketing teams rely on.
Workflow Type 1: Cold Outreach Workflow
This is the bread and butter of lead generation. The goal is to systematically engage new, cold prospects and convert them into meetings.
- -Trigger: A new lead is added to a prospect list (e.g., from a Sales Navigator search).
- -Action 1 (Day 1): Send a personalized connection request.
- -Action 2 (Day 3): If connected, send the first personalized message focused on a specific pain point.
- -Action 3 (Day 7): If no reply, send a follow-up message with social proof (like a mini case study).
- -Action 4 (Day 14): If still no reply, send a final, gentle "break-up" message to close the loop.
- -Conversion Point: Meeting booked.
- -Timeline: ~2 weeks.
Workflow Type 2: Lead Qualification Workflow
This workflow is designed to quickly separate the wheat from the chaff after someone connects with you. It filters high-intent leads from those who aren't a good fit.
- -Trigger: A prospect accepts your connection request.
- -Action 1: Immediately send a welcome message with a qualifying question (e.g., "What's your team's biggest challenge with X right now?").
- -Action 2: Score the lead's response based on your Ideal Customer Profile (ICP) criteria.
- -Action 3: If qualified, the workflow routes the lead and conversation to a sales rep.
- -Action 4: If not qualified, the workflow automatically adds them to a long-term nurture sequence.
- -Conversion Point: A lead is officially marked as "Sales Qualified."
- -Timeline: ~1 week.
Workflow Type 3: Engagement-Based Workflow
This is a warmer, more subtle approach. Instead of a direct pitch, you use a prospect's own activity as the reason to reach out, building rapport first.
- -Trigger: A target prospect engages with your company's content or a specific competitor's post.
- -Action 1: Automatically engage with their content (e.g., like or comment on their recent post).
- -Action 2: A day later, send a connection request referencing the shared interest.
- -Action 3: Once connected, send a personalized message that continues the conversation.
- -Action 4: Continue light, authentic engagement over time.
- -Conversion Point: Meeting booked.
- -Timeline: 2-3 weeks.
Workflow Type 4: Account-Based Selling Workflow
When targeting large, high-value accounts, you need a coordinated, multi-threaded approach. This workflow orchestrates outreach across multiple contacts within the same organization.
- -Trigger: A new target account is identified and key contacts are added to a list.
- -Action 1: Initiate multi-threaded outreach to 3+ contacts simultaneously (e.g., a decision-maker, an influencer, and a potential champion).
- -Action 2: Deploy coordinated messaging, with each contact receiving a slightly different angle relevant to their role.
- -Action 3: Engage at the account level by liking and commenting on the company's official LinkedIn page.
- -Action 4: If no traction, an escalation sequence is triggered to engage a more senior contact.
- -Conversion Point: A qualified sales opportunity is created in the CRM.
- -Timeline: 4+ weeks.
Workflow Type 5: Nurture Workflow
What about leads who say "not right now"? Don't let them go cold. This long-term workflow keeps you top-of-mind by delivering value over time.
- -Trigger: A lead is marked as "not ready to buy" in your CRM or automation tool.
- -Action 1: The lead is automatically added to a long-term nurture sequence.
- -Action 2: Periodically send valuable, non-salesy content (blog posts, whitepapers, webinar invites).
- -Action 3: The workflow includes periodic, light engagement actions (e.g., view profile, like a post).
- -Action 4: After 90 days, a re-engagement sequence attempts to restart the conversation.
- -Conversion Point: The lead is re-qualified and becomes sales-ready.
- -Timeline: Ongoing (typically 30-90 days).
The 8-Step LinkedIn Automation Workflow Design Framework
Ready to build your own? A successful LinkedIn automation workflow design doesn't happen by accident. It follows a structured process. Here’s a step-by-step framework to guide you from idea to execution.
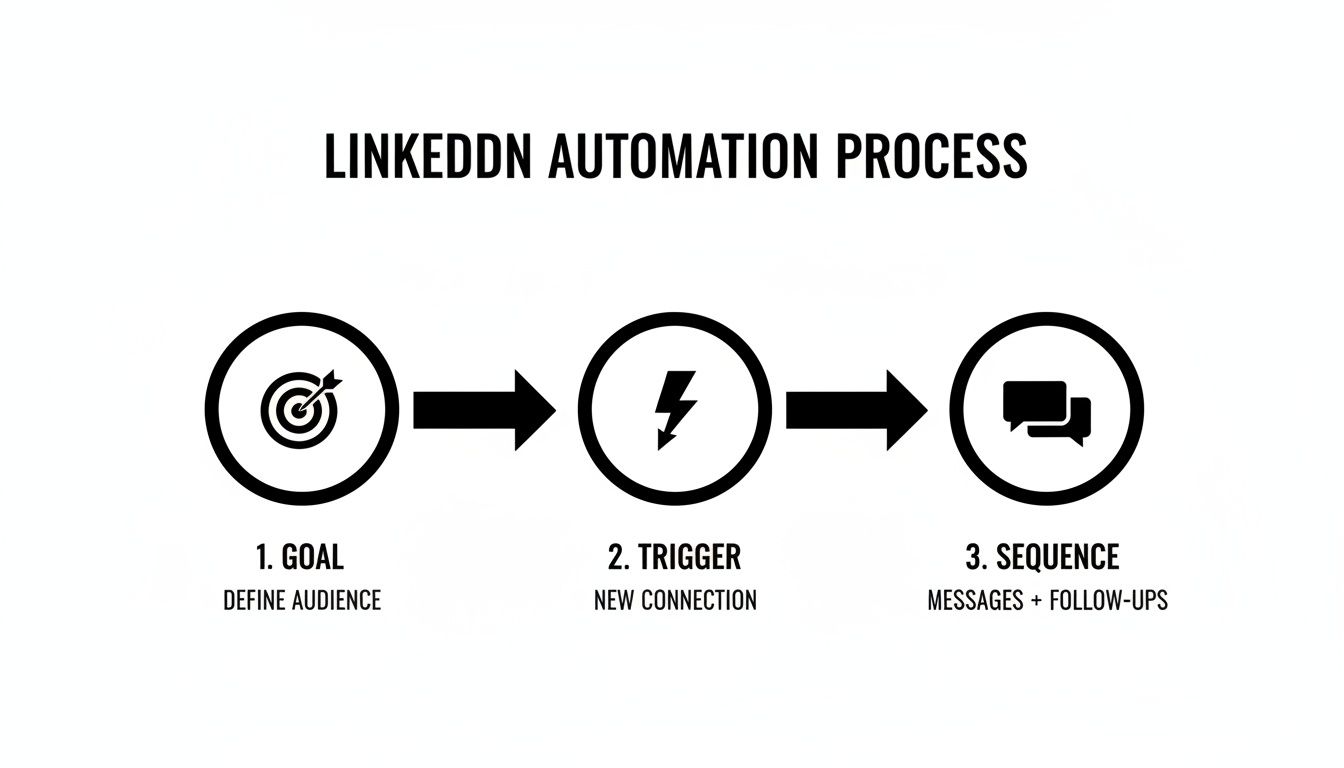
Step 1: Define Your Workflow Objectives
First things first: what are you trying to achieve? Without a clear goal, your workflow is just busywork. Get specific.
- -Goal: Is it booking meetings, generating qualified leads, or driving event registrations?
- -Target: Who is your ICP? Be precise about titles, industries, and company sizes.
- -Timeline: How long should the workflow run? A 2-week cold outreach sprint is very different from a 90-day nurture sequence.
- -Success Metric: How will you measure success? Define your target conversion rate or ROI.
Actionable Step: Write down a single, clear objective sentence. Example: "Book 10 qualified meetings per month with VPs of Engineering at US-based fintech startups with 50-200 employees."
Step 2: Map the Customer Journey
Think about the path your prospect takes. Where does your workflow fit in? Understanding their journey helps you tailor your messaging for each stage.
- -Awareness: How do they first become aware of the problem you solve?
- -Consideration: How do they research and evaluate potential solutions?
- -Decision: What information do they need to make a final choice?
- -Action: What's the final step to becoming a customer?
Actionable Step: Sketch out a simple flowchart of your ideal customer's journey. Pinpoint where your LinkedIn touchpoints will be most impactful.
Step 3: Identify Your Workflow Triggers
A trigger is the event that starts the engine. A well-chosen trigger makes your outreach timely and relevant.
- -New Lead Added: The classic trigger for cold outreach campaigns.
- -Connection Accepted: The most common trigger for starting a welcome or qualification sequence.
- -Content Engagement: When a prospect likes, comments on, or shares your content.
- -Link Clicked: A strong intent signal that a prospect is interested in a specific topic.
- -Time-Based: A trigger that fires after a set amount of time (e.g., "7 days after the last message").
Actionable Step: Choose one primary trigger for your workflow. What's the single best signal that it's the right time to reach out?
Step 4: Design Your Workflow Actions
Now for the fun part. What will your workflow actually do? Mix and match different actions to create a natural, multi-touch experience.
- -Messaging: Connection requests, direct messages, InMails.
- -Engagement: Profile views, likes, comments.
- -Data: Tagging a prospect, scoring a lead, segmenting a list.
- -Integration: Updating a record in your CRM, sending a webhook to another tool.
Actionable Step: List out the sequence of 5-7 actions for your workflow, combining different types for a more human feel.
Step 5: Set Your Workflow Conditions
This is where your workflow gets smart. Conditional logic (if/then) ensures the right actions happen at the right time.
- -IF connection is accepted, THEN send welcome message.
- -IF prospect replies to a message, THEN pause automation and notify sales.
- -IF prospect clicks a link to a case study, THEN tag them as "high-intent."
- -IF no response after 14 days, THEN remove from this workflow and add to a long-term nurture list.
Actionable Step: Add at least two conditional rules to your workflow map to handle different prospect behaviors.
Step 6: Define Timing & Frequency
Pacing is everything. Bombarding a prospect is the fastest way to get ignored or blocked.
- -Delays: Set realistic delays between actions (e.g., 2-4 days between messages).
- -Send Times: Schedule actions to run during your prospect's business hours.
- -Frequency Limits: Respect platform limits. A conservative approach is always safer.
- -Total Duration: Define the total time a prospect will spend in the workflow.
Actionable Step: Add specific time delays (e.g., "Wait 3 days") between each action in your sequence.
Step 7: Plan for Personalization
This is non-negotiable. Generic outreach is dead.
- -Dynamic Variables: Go beyond
{{FirstName}}. Use{{CompanyName}},{{JobTitle}}, and{{Industry}}. - -Contextual Messaging: Reference shared groups, connections, or recent company news.
- -Research-Based Snippets: For high-value targets, include a custom-written sentence based on your research.
- -A/B Testing: Plan to test different personalization angles to see what resonates.
Actionable Step: Identify three personalization variables you will use in your message templates.
Step 8: Set Up Tracking & Analytics
If you can't measure it, you can't improve it.
- -Metrics: Define the key metrics you'll track (acceptance rate, reply rate, meeting booked rate).
- -Tracking: Use UTM parameters or tracking links to measure clicks.
- -Conversion Goals: Set up conversion tracking in your automation tool.
- -Baseline: Establish a baseline before you start so you can accurately measure improvement.
Actionable Step: Create a simple spreadsheet to track your workflow's key metrics on a weekly basis.
Proven Workflow Templates & Examples
Theory is great, but let's get practical. Here are five battle-tested LinkedIn automation workflow examples you can adapt and deploy today. Each one includes a clear timeline, key actions, and the kind of conversion rates users often report when executed well.
Template 1: The 2-Week Cold Outreach Workflow
The classic workhorse for generating new leads from a cold list.
- -Day 1: Send a personalized connection request referencing a shared interest or commonality.
- -Day 3: Once connected, send the first message focusing on their potential pain point and your value proposition. Keep it short and about them.
- -Day 7: Follow up with a piece of social proof—a compelling stat, a mini case study, or a link to a valuable resource.
- -Day 14: Send a final, polite follow-up to close the loop. This "break-up" message often gets a surprising number of replies.
- -Conversion Goal: Meeting booked.
- -Expected Conversion Rate: 2-5% (from lead to meeting).
Template 2: The 1-Week Lead Qualification Workflow
Perfect for quickly sorting new connections into "hot" and "not-yet" buckets.
- -Day 1: As soon as they accept your request, send a welcome message with a thoughtful, open-ended qualifying question.
- -Day 2: When a response comes in, your team scores the lead based on their answer and profile.
- -Day 3 (If Qualified): The workflow automatically alerts a sales rep to take over the conversation manually.
- -Day 3 (If Not Qualified): The workflow adds the lead to a long-term nurture sequence for future follow-up.
- -Conversion Goal: Qualified lead generated.
- -Expected Qualification Rate: 20-30% of new connections.
Template 3: The 3-Week Engagement-Based Workflow
A warmer approach that leverages a prospect's own activity to start a conversation.
- -Day 1: Start by engaging with the prospect's content. Leave a thoughtful comment on a recent post.
- -Day 2: Send a connection request that references the interaction (e.g., "Loved your thoughts on...").
- -Day 4: After they connect, send a personalized message that expands on the topic.
- -Day 7-14: Continue light engagement—a like here, another comment there—to stay visible.
- -Day 21: Send a follow-up message that gently pivots towards a business conversation.
- -Conversion Goal: Meeting booked.
- -Expected Conversion Rate: 3-7% (often higher quality than pure cold outreach).
Template 4: The 4-Week Account-Based Workflow
For targeting those big fish. This coordinates outreach across a key account.
- -Week 1: Launch multi-threaded outreach to at least 3 contacts at the target account.
- -Week 2: Deploy coordinated but personalized messaging to each contact, highlighting benefits relevant to their specific role.
- -Week 3: Focus on account-level engagement by interacting with the company's official LinkedIn page.
- -Week 4: If there's no engagement, trigger an escalation sequence to a more senior contact or try a different channel.
- -Conversion Goal: Sales opportunity created.
- -Expected Conversion Rate: 5-10% (from account to opportunity).
Template 5: The 90-Day Nurture Workflow
For the leads who aren't ready to buy today. This long-term play keeps you top-of-mind.
- -Weeks 1-2: Kick off with a welcome sequence that delivers your best educational content (no selling).
- -Weeks 3-4: Share case studies and social proof to build credibility.
- -Weeks 5-6: Introduce more product-focused content that highlights specific benefits.
- -Weeks 7-8: Continue sharing value and engaging lightly with their content.
- -Weeks 9-12: Launch a re-engagement sequence to check in and see if their priorities have changed.
- -Conversion Goal: Sales-ready lead.
- -Expected Conversion Rate: 10-20% of nurtured leads eventually become sales-ready.
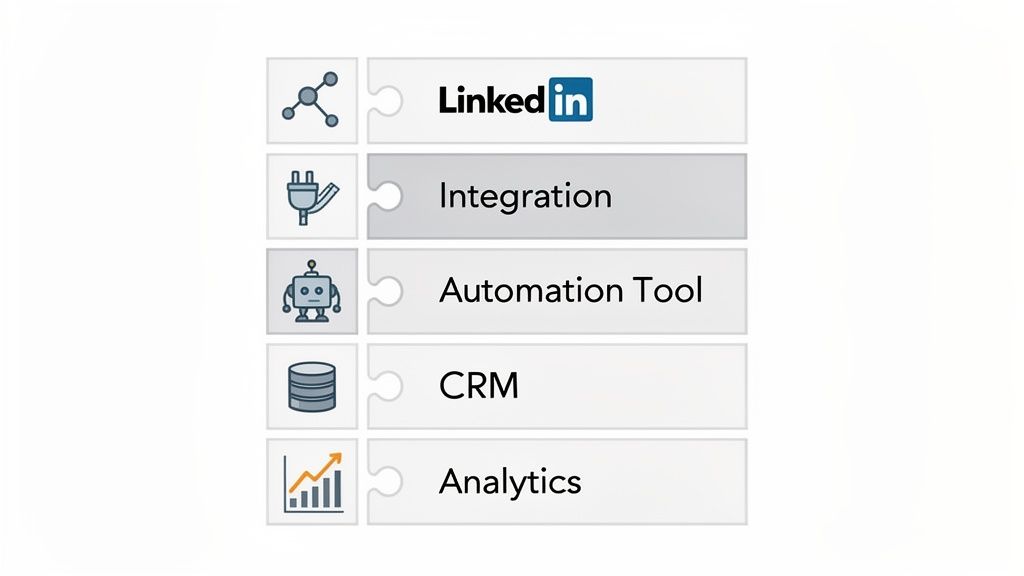
Choosing Your LinkedIn Workflow Automation Tools & Platforms
Even the most brilliant workflow is just a drawing on a whiteboard without the right tech to bring it to life. But let's be real: the market for LinkedIn workflow automation tools is a jungle. jungle. 😵 How do you pick the right one?
Let’s break down the main categories to help you find the best fit for your team's skills, budget, and goals.
LinkedIn-Native Workflows
LinkedIn itself offers some basic automation features, primarily through Sales Navigator. You can save lead searches, get alerts on prospect activity, and send InMails.
- -Capabilities: Simple lead list management and alerts.
- -Limitations: No complex sequencing, conditional logic, or deep CRM integration.
- -Best For: Solo sales reps managing a small number of high-value accounts who want to stay 100% within LinkedIn's ecosystem.
Zapier for LinkedIn Workflows
Zapier acts as the glue between LinkedIn and thousands of other apps. It uses simple "if this, then that" rules (called Zaps) to automate tasks. For example, you can create a Zap to automatically add a new LinkedIn connection to a Google Sheet or your CRM.
- -Capabilities: Simple, trigger-based data transfers and notifications.
- -Pricing: Starts with a free plan, but costs increase with task volume.
- -Best For: Non-technical users who need to connect LinkedIn to other tools for basic data-syncing tasks.
n8n for LinkedIn Workflows
If Zapier is a point-and-shoot camera, n8n is a professional DSLR. It's a powerful, open-source automation platform that gives you granular control over your workflows.
- -Capabilities: Advanced conditional logic, data manipulation, and complex, multi-step sequences.
- -Pricing: Offers a generous free, self-hosted option and paid cloud plans.
- -Best For: Technical users, developers, and automation specialists who want maximum power and flexibility to build custom solutions.
Dedicated LinkedIn Automation Tools
This is the most popular category. Tools like Expandi, HeyReach, and Meet Alfred are built specifically for LinkedIn outreach. They offer a suite of features designed for prospecting at scale.
- -Capabilities: Advanced sequence builders, smart safety limits, A/B testing, detailed analytics, and built-in templates.
- -Pricing: Typically subscription-based, ranging from $50 to $150 per user per month.
- -Best For: Sales teams and agencies that need a feature-rich, dedicated platform for running sophisticated LinkedIn campaigns. Many also function as great Trigify alternatives.
CRM-Based Workflows
For teams that live in their CRM, platforms like HubSpot, Salesforce, and Pipedrive often have their own workflow automation features with LinkedIn integrations. This creates a single source of truth for all prospect interactions.
- -Capabilities: Trigger LinkedIn actions based on CRM data and automatically log all LinkedIn activity to a contact's record.
- -Limitations: The LinkedIn-specific features may be less advanced than dedicated tools.
- -Best For: CRM-centric sales teams who prioritize data hygiene and a unified view of the customer journey.
Workflow Design Best Practices
A powerful tool is only half the battle. Executing your LinkedIn automation workflow with finesse is what separates success from spam. Here are the essential best practices to keep your account safe and your outreach effective.
Practice 1: Keep Workflows Simple (At First)
It's tempting to build a 20-step mega-workflow with complex conditional logic. Don't. 🙅♂️ Start with a simple, linear sequence focused on one clear objective. Test each step, understand the results, and then gradually add complexity. Over-automating from day one is a recipe for confusion and poor performance.
Practice 2: Prioritize Personalization
This is the golden rule. Automation fails when it feels automated.
- -Always Personalize: Never send a generic connection request or message.
- -Use Dynamic Variables: Go beyond
{{FirstName}}. Use{{CompanyName}}or a custom field you've researched. - -Research Prospects: A single sentence referencing a recent post or company announcement can skyrocket reply rates.
- -Focus on Quality: One thoughtful, personalized message is worth more than 100 generic blasts.
Practice 3: Respect Rate Limits
LinkedIn is constantly cracking down on spammy behavior. Pushing the limits is the fastest way to get your account restricted. While LinkedIn doesn't publish official numbers, community feedback suggests these are safe daily maximums:
- -Connection Requests: 50-70 per day
- -Direct Messages: 100-150 per day
- -Profile Views: 250-300 per day
Always take a conservative approach. Good automation tools have built-in safety features to help you stay within these guardrails. Monitor your account closely and be ready to adjust.
Practice 4: Test & Optimize Relentlessly
Your workflow should never be "set it and forget it." The top performers are constantly testing.
- -A/B Test Messages: Test different subject lines, value propositions, and calls-to-action.
- -Test Timing: Experiment with different delays between steps and different times of day.
- -Test Targeting: Analyze which of your audience segments are responding best.
- -Implement Winners: Let the data tell you what works, then double down on it.
Practice 5: Monitor & Maintain
A healthy workflow requires regular check-ups.
- -Daily Monitoring: A quick 5-minute check to ensure everything is running smoothly and to handle replies.
- -Weekly Reviews: Look at your analytics. What are the acceptance and reply rates? What's working?
- -Monthly Audits: Do a deeper dive. Is your messaging still relevant? Is your targeting still sharp?
- -Document Learnings: Keep a log of your tests and results to inform future campaigns.
Workflow Optimization Strategies
Launching your workflow is just the beginning. The real magic happens when you start optimizing. Here are five key areas to focus on for continuous improvement.
Optimization 1: Message Optimization
Your messaging is your highest leverage point.
- -A/B Test Openers: Your first sentence is critical. Test different hooks to see what grabs attention.
- -Test Value Propositions: Pit two different ways of describing your solution against each other.
- -Refine Personalization: Test if a highly-researched custom line outperforms a simpler dynamic tag.
- -Test Calls-to-Action (CTAs): Compare a "soft" CTA (e.g., asking for thoughts) with a "hard" CTA (e.g., asking for a meeting).
Actionable Step: Set up an A/B test on your first message and let it run for 200 prospects. Implement the winner.
Optimization 2: Timing Optimization
When you send can be as important as what you send.
- -Test Send Times: Analyze your reply rates by time of day and day of week. Do prospects in one industry respond more on Monday mornings?
- -Optimize Delays: Is a 3-day delay between messages better than 5 days? Test it.
- -Test Frequency: Could you add one more valuable touchpoint without being annoying?
Actionable Step: Split your audience and test sending your workflow from 9-11 AM vs. 1-3 PM.
Optimization 3: Targeting Optimization
Not all leads are created equal. Use your data to find the gold.
- -Analyze Segments: Which job titles, industries, or company sizes have the highest conversion rates?
- -Refine Your ICP: Your results may show that your initial ICP hypothesis was slightly off. Adjust it.
- -Focus on High-Intent Signals: Double down on triggers that indicate strong buying intent, like recent job changes or content engagement.
Actionable Step: Review your last 10 booked meetings. What do they have in common? Refine your targeting to find more people like them.
Optimization 4: Sequence Optimization
Look at your workflow as a whole.
- -Remove Low-Performing Steps: If a specific message in your sequence has a terrible reply rate, cut it or replace it.
- -Add High-Performing Steps: Could you add a profile view or a content engagement step before your first message to warm up the lead?
- -Optimize Conversion Points: Is your goal to book a meeting right away, or would you get better results by first inviting them to a webinar?
Actionable Step: Map out your sequence and identify the weakest link—the step with the biggest drop-off. Focus your optimization efforts there first.
Optimization 5: Conversion Optimization
Ultimately, it's all about turning conversations into outcomes.
- -Improve Message Clarity: Is your value proposition crystal clear and easy to understand in 5 seconds?
- -Strengthen Social Proof: Are you using your most compelling stats or customer logos?
- -Reduce Friction: Is your CTA easy to act on? A calendar link is lower friction than asking "what time works for you?"
Actionable Step: Ask a colleague to read your message sequence. If they can't understand what you do and what you want in 30 seconds, simplify it.
Workflow Integration with Your CRM
An isolated LinkedIn workflow is good. A LinkedIn automation CRM workflow is a game-changer. Integrating your automation tool with your CRM creates a single source of truth and unlocks powerful new efficiencies.
CRM Integration Basics: The 5-Step Setup
- Connect Your Tools: Use native integrations or a tool like Zapier to connect your LinkedIn automation platform to your CRM.
- Map Your Fields: Tell the systems how to talk to each other. Map fields like "First Name," "Company," "Job Title," and "LinkedIn Profile URL."
- Set Up Lead Syncing: Create a rule that automatically creates a new lead or contact in your CRM when a connection is made on LinkedIn.
- Configure Activity Logging: Set up automation to log key activities—like messages sent, messages received, and links clicked—on the contact's timeline in the CRM.
- Test the Data Flow: Run a test with your own profile to ensure data is passing between the systems correctly.
Powerful Workflow-CRM Scenarios
Once connected, you can build incredibly powerful automations:
- -Scenario 1: A new lead is created in your CRM, which automatically triggers the start of a LinkedIn outreach workflow.
- -Scenario 2: A prospect accepts your connection request on LinkedIn, which updates their status in the CRM from "Cold" to "Engaged."
- -Scenario 3: A prospect clicks a link to your pricing page, which automatically increases their lead score in the CRM and notifies a sales rep.
- -Scenario 4: A meeting is booked via your LinkedIn workflow, which automatically creates a new deal/opportunity in your CRM sales pipeline.
- -Scenario 5: A deal is marked as "Closed-Won" in the CRM, which automatically removes the contact from all prospecting workflows.
Maintaining Data Accuracy
A great integration requires great data hygiene.
- -Regular Audits: Periodically check for data inconsistencies between systems.
- -Duplicate Management: Have a clear process for merging duplicate contacts that might be created.
- -Data Enrichment: Use tools to enrich CRM records with fresh data to keep your personalization sharp.
Real-World Workflow Case Studies
Let's look at how this works in the real world. Based on industry reports and user case studies, here are three examples of effective workflow implementation.
Case Study 1: SaaS Cold Outreach Workflow
- -Company Profile: A Series B SaaS company selling project management software to marketing agencies.
- -Workflow Design: A classic 2-week cold outreach workflow targeting Marketing Directors. The key was a highly personalized first message that referenced a recent project the agency had promoted.
- -Results: They achieved a 72% connection acceptance rate and a 24% reply rate to their first message. This translated into a 4.5% conversion rate from lead to booked demo, generating an extra 15-20 qualified demos per month.
- -Key Success Factor: Hyper-personalization based on public agency portfolio work.
Case Study 2: B2B Services Lead Qualification Workflow
- -Company Profile: A corporate law firm specializing in intellectual property for tech startups.
- -Workflow Design: An engagement-based workflow triggered when founders of recently funded startups engaged with content about patents or trademarks. The sequence started with a comment, followed by a connection request, and a qualification message offering a free IP checklist.
- -Results: The qualification rate for inbound connections jumped from 15% to over 40%. The sales team's efficiency skyrocketed as they spent their time talking only to highly relevant, pre-qualified founders.
- -Replicable Strategy: Using funding announcements and content engagement as high-intent triggers.
Case Study 3: Enterprise Account-Based Workflow
- -Company Profile: An enterprise cybersecurity firm targeting Fortune 500 companies.
- -Workflow Design: A 6-week, multi-threaded account-based workflow. It targeted the CISO, a Director of IT, and a Security Architect at each account. Messaging was coordinated, with each contact receiving content relevant to their role (e.g., high-level ROI for the CISO, technical whitepaper for the architect).
- -Results: They saw a 3x increase in the number of opportunities created within their target accounts and shortened the average sales cycle by nearly 30 days by building consensus across the buying committee simultaneously.
- -Lesson Learned: A coordinated, multi-threaded approach is essential for breaking into large, complex organizations.
Common Workflow Mistakes to Avoid (And How to Fix Them)
Building workflows is part art, part science. It's easy to make a few common missteps. Here's what to watch out for.
Mistake 1: Over-Complicated Workflows
- -The Problem: Your workflow has too many steps, too many conditions, and is impossible to manage or troubleshoot. Performance is often poor because prospects get lost in the complexity.
- -The Solution: Simplify. Start with a basic, linear sequence. Master it, then add one layer of complexity at a time. Your goal is clarity, not cleverness.
Mistake 2: Generic, Robotic Messaging
- -The Problem: Your messages lack any real personalization beyond
{{FirstName}}. Response rates are in the gutter, and you risk getting your account flagged for spam. - -The Solution: Personalize everything. Invest the time to research your prospects. A single, well-researched sentence is your greatest weapon.
Mistake 3: Poor Timing and Pacing
- -The Problem: Messages are sent at odd hours, or follow-ups are sent too quickly. This screams "automation" and leads to low open rates and high block rates.
- -The Solution: Optimize your timing. Schedule your workflows to run during normal business hours in your prospect's time zone. Set delays of at least 2-3 days between messages.
Mistake 4: Ignoring the Analytics
- -The Problem: You have no idea what's actually working. You're not tracking acceptance rates, reply rates, or conversions, so you're flying blind.
- -The Solution: Track everything. Your automation tool is a goldmine of data. Set up a simple dashboard to monitor your key metrics weekly and use that data to make informed decisions.
Mistake 5: Not Testing Continuously
- -The Problem: You built a workflow six months ago and haven't touched it since. Your results are slowly degrading as your messaging gets stale.
- -The Solution: Always be testing. A/B testing should be a constant process. Always have a test running on your core workflows—whether it's the messaging, the timing, or the offer.
Your Workflow Troubleshooting Guide
Even the best workflows run into trouble. Here’s a quick guide to diagnosing and fixing the most common issues.
Problem 1: Low Conversion Rate
- -Root Causes: Your offer isn't compelling, your messaging is unclear, or you're targeting the wrong audience.
- -Diagnostic Steps: Review your entire sequence. Is the value proposition strong? Is the CTA clear? Are the people you're contacting a perfect fit for your solution?
- -Solutions: A/B test a completely new value proposition. Refine your targeting criteria to be more specific.
Problem 2: Low Open/Response Rate
- -Root Causes: Your connection request is generic, your first message doesn't grab attention, or your timing is off.
- -Diagnostic Steps: Check your connection acceptance rate. If it's low, your request needs work. If acceptance is high but replies are low, the problem is your first message.
- -Solutions: Add stronger personalization to your connection request. Rewrite the first sentence of your message to be more compelling and prospect-focused.
Problem 3: The Workflow Isn't Triggering
- -Root Causes: The trigger event isn't configured correctly in your tool, or there's a technical issue with the platform.
- -Diagnostic Steps: Double-check your trigger settings. Is it set to "Connection Accepted" or something else? Run a test with a colleague to see if they enter the workflow.
- -Solutions: Verify your trigger logic. If it seems correct, check your tool's status page or contact their support.
Problem 4: Data Isn't Syncing to Your CRM
- -Root Causes: The integration between your automation tool and CRM is broken, or the fields are mapped incorrectly.
- -Diagnostic Steps: Check the integration settings in both platforms. Look at the error logs. Is there a specific field that's failing to sync?
- -Solutions: Re-authenticate the connection between the tools. Carefully review your field mapping to ensure "Company Name" on LinkedIn is mapped to "Company Name" in your CRM.
Problem 5: Your LinkedIn Account Gets Restricted
- -Root Causes: You're exceeding rate limits, your connection requests have a very low acceptance rate, or multiple people have reported your messages as spam.
- -Diagnostic Steps: Immediately pause all automation. Review your daily activity numbers.
- -Solutions: Significantly reduce your daily frequency. Improve the quality and personalization of your outreach to increase acceptance rates. Appeal the restriction with LinkedIn support after a cool-down period.
Scaling Your LinkedIn Automation Workflows
Once you have a proven workflow, it's time to scale. But scaling isn't just about increasing the volume. It's about growing intelligently.
Phase 1: Optimize a Single Workflow to Perfection
Before you do anything else, make sure your first workflow is a finely-tuned machine. Get it to a point where it consistently hits your target conversion rate. Document everything—this is your playbook.
Phase 2: Expand to New Segments
Take your proven workflow and test it on an adjacent audience segment. Maybe you've had great success with VPs of Sales, so now you test it with VPs of Marketing. You may need to adapt the messaging, but the core structure remains. Scale gradually and monitor performance closely.
Phase 3: Add New Workflows to Your Portfolio
With one or two successful workflows running, it's time to build a new one for a different objective. For example, if your cold outreach workflow is humming, build a nurture workflow for leads that aren't ready to buy yet. Manage the complexity and ensure they work together.
Phase 4: Optimize Your Entire Portfolio
You're now managing a portfolio of automation workflows. Regularly analyze the performance of all of them. Identify your top performers and double down on what's working. Don't be afraid to retire underperforming workflows to focus your resources where they'll have the most impact.
The Future of LinkedIn Automation Workflows
The world of automation is moving fast. Here's a glimpse of what's next and how it will shape the future of the LinkedIn automation process.
AI-Powered Workflows
Artificial intelligence is no longer a buzzword; it's a core component.
- -AI Message Generation: AI will help draft highly personalized messages based on a prospect's profile, activity, and company data.
- -Predictive Lead Scoring: AI will analyze hundreds of data points to predict which prospects are most likely to convert, allowing you to prioritize your outreach.
- -Intelligent Timing: AI will learn the optimal time to send a message to each individual prospect based on their past activity patterns.
- -Autonomous Optimization: Workflows will start to optimize themselves, automatically A/B testing and implementing winning variations.
Advanced Workflow Features
The tools themselves are getting smarter.
- -Multi-Channel Workflows: Seamlessly orchestrate outreach across LinkedIn, email, and even SMS within a single workflow.
- -Advanced Conditional Logic: Build even more sophisticated "if/then" rules based on a wider range of prospect behaviors.
- -Machine Learning Optimization: Platforms will use machine learning to analyze your results and provide proactive recommendations for improvement.
Build Your Unstoppable Lead Gen Engine
We've covered a lot of ground—from the fundamental definition of a LinkedIn automation workflow to the nitty-gritty of design, optimization, and scaling.
The key takeaway is this: success on LinkedIn is no longer about brute force. It's about strategy, personalization, and intelligent automation. A well-designed workflow is the system that turns manual, unpredictable prospecting into a reliable engine for generating high-quality leads.
Your next step is simple. Don't try to build everything at once. Pick one workflow type from the templates above, follow the 8-step design framework, and launch your first campaign. Measure, learn, and iterate. That is the path to building a truly unstoppable pipeline.
Frequently Asked Questions
Still have a few questions? Let's tackle some of the most common ones.
How many follow-ups is too many in a workflow?
The general consensus among sales pros is that 3 to 5 total touchpoints (including the initial connection request and message) over 2-4 weeks is the sweet spot. Fewer than that, and you risk getting lost in the noise. More than that, and you start to look like a pest. The key is to add value with each follow-up, not just "bumping this to the top of your inbox."
Can you automate LinkedIn InMail messages?
Yes, many advanced automation tools that integrate with LinkedIn Sales Navigator allow you to include InMails as a step in your workflow. Because InMails have a high open rate, they are best used strategically for your highest-value prospects, not as a replacement for standard messages in every workflow.
What's the best time of day to run a LinkedIn workflow?
While it varies by industry and time zone, user data consistently shows the highest engagement during the workweek. The peak windows are typically Tuesday through Thursday, between 9 AM - 11 AM and 1 PM - 3 PM in your prospect's local time. Avoid running automation on weekends or overnight to maintain the appearance of human behavior. Always test to see what works best for your specific audience.
Should you automate likes and comments?
Proceed with extreme caution. While technically possible, automated comments often sound generic ("Great post!") and can do more harm than good to your reputation. A much safer and more effective strategy is to use automation to identify engagement opportunities. Set up a workflow to alert you when a top prospect posts, then jump in to write a thoughtful, genuine comment yourself. This combines the efficiency of automation with the authenticity of a human touch.
Ready to stop prospecting and start generating pipeline on autopilot? GojiberryAI is your AI copilot for identifying high-intent leads and engaging them with perfectly timed outreach.

More High-Intent Leads = Your New Growth Engine.
Start Now and Get New High Intent Leads Delivered Straight to Slack or Your Inbox.